Tired of manually copying data, dealing with inconsistent entries, or struggling to analyze survey responses efficiently? If you’re using Google Forms for anything from event registrations to customer feedback or academic quizzes, you know how crucial it is to get that data into a usable format. The good news is, you don’t have to spend hours wrestling with spreadsheets. This definitive guide will show you how to connect Google Forms to Google Sheets automatically, transforming your data collection process from a chore into a seamless, real-time operation. By the end of this tutorial, you’ll be able to set up a robust system that captures every form submission directly into a Google Sheet, ready for analysis, reporting, and further manipulation.
Why Connect Google Forms to Google Sheets Automatically?
Connecting Google Forms to Google Sheets isn’t just about saving time; it’s about unlocking the full potential of your collected data. For office professionals, educators, and students alike, this integration offers a myriad of benefits that streamline workflows and enhance analytical capabilities.
Streamlined Data Collection
Imagine running a workshop registration, and every sign-up instantly appears in a spreadsheet. No more downloading CSVs, no more copying and pasting. This automatic connection ensures that as soon as someone submits a form, their response is recorded in your Google Sheet, maintaining a single, up-to-date source of truth. This is particularly valuable for time-sensitive data, like live polls or immediate feedback surveys.
Real-time Analytics
Once your form data is flowing directly into Google Sheets, the possibilities for real-time analysis explode. You can set up formulas that automatically calculate totals, averages, or percentages as new data comes in. Need to know how many “Yes” responses you have right now? A simple COUNTIF function can provide that instantly. This real-time visibility is invaluable for monitoring project progress, assessing campaign performance, or tracking student submissions.
Enhanced Data Manipulation and Reporting
Google Sheets is a powerful tool for data organization and analysis. With your form responses living directly in a sheet, you can:
- Filter and Sort: Quickly find specific entries or arrange data to identify trends.
- Apply Formulas: Use functions like
SUM,AVERAGE,VLOOKUP, or even more advancedARRAYFORMULAto process raw data into meaningful insights. For instance, if your form collects ‘Quantity’ and ‘Unit Price’, you can add a column in your Sheet to automatically calculate ‘Total Price’ for each submission. - Create Pivot Tables: Summarize large datasets to uncover patterns, like the most popular workshop session or the demographic breakdown of your respondents.
- Generate Charts and Graphs: Visualize your data directly within Google Sheets to create compelling reports and dashboards that are easy to understand for your non-technical audience.
- Integrate with Other Tools: Use your connected Sheet as a data source for Google Data Studio (Looker Studio), Google Apps Script, or other third-party applications for even more advanced automation and reporting.
By understanding how to connect Google Forms to Google Sheets automatically, you’re not just moving data; you’re building a foundation for powerful, automated data management.
The Basic Connection: Linking Your Form to a New Sheet
The most straightforward way to connect your Google Form to Google Sheets is to let Google Forms create a brand new spreadsheet for your responses. This is ideal when you’re starting a new data collection project and want a clean slate dedicated solely to your form’s responses.
Step-by-Step Guide
Here’s how to set up this initial, automatic connection:
-
Open Your Google Form:
Navigate to forms.google.com and open the specific form you wish to connect to a spreadsheet. You can either open an existing form or create a new one. -
Navigate to the Responses Tab:
At the top of your Google Form editor, you’ll see three main tabs: Questions, Responses, and Settings. Click on the Responses tab. This tab gives you an overview of all submissions received so far. -
Create a New Spreadsheet:
On the Responses tab, look for the green Google Sheets icon. It often looks like a cross. Click on this icon. A pop-up window will appear, presenting you with two options:- “Create a new spreadsheet”
- “Select existing spreadsheet”
Choose “Create a new spreadsheet”. Google Forms will automatically suggest a name for this new sheet, usually the name of your form followed by “(Responses)”. You can accept this default or rename it to something more descriptive, like “Event Registration Data” or “Q3 Customer Survey Results”.
-
Confirm the Connection:
After selecting “Create a new spreadsheet” and optionally renaming it, click the “Create” button. Google Forms will then establish the connection. A message will confirm that the form is now linked to a spreadsheet, and the green Sheets icon will change to display the message “View responses in Sheets” when you hover over it.
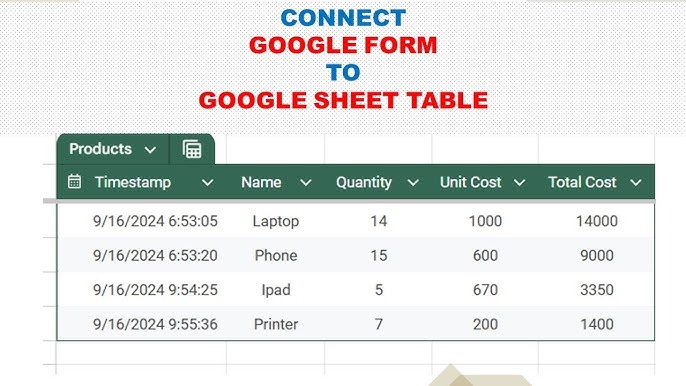
You can click this icon at any time to instantly open the connected Google Sheet in a new browser tab. Each question from your Google Form will become a column header in your spreadsheet, and every new form submission will populate a new row of data, complete with a timestamp.
Tip: Google Forms automatically adds a Timestamp column as the first column (
A) in your connected sheet. This is incredibly useful for tracking when each response was submitted. Do not delete this column, as it’s integral to the form’s ability to record submissions chronologically.
Using an Existing Google Sheet for Your Form Responses
While creating a new sheet is simple, sometimes you might want to direct your form responses into an existing Google Sheet. This is particularly useful if you have a master spreadsheet for a project, a dashboard that needs live updates, or if you’re consolidating data from multiple sources into one location.
Why Choose an Existing Sheet?
- Consolidation: Keep all related data for a project in one workbook, even if it comes from different sources (other forms, manual entry, imported CSVs).
- Dashboards: Direct form responses into a sheet that already contains formulas, pivot tables, or charts referencing that data, ensuring your reports are always up-to-date.
- Pre-existing Structure: If you have specific tabs or a pre-defined layout where you want your form data to land, linking to an existing sheet allows you this flexibility.
How to Link to an Existing Sheet
The process is similar to creating a new sheet, with one key difference in step 3:
-
Open Your Google Form:
Go to forms.google.com and open the form you want to connect. -
Navigate to the Responses Tab:
Click on the Responses tab at the top of the form editor. -
Select Existing Spreadsheet:
Click the green Google Sheets icon. In the pop-up window, choose the option “Select existing spreadsheet”. -
Choose Your Target Sheet:
A new window will open, displaying your recent Google Sheets files. Browse or search for the specific Google Sheet you want to connect to. Select the desired sheet and click the “Select” button.Google Forms will then link to this existing spreadsheet and create a new tab (or “sheet”) within it, usually named “Form Responses 1” (or “Form Responses 2”, etc., if you’ve connected forms before). All future responses will populate this new tab.
Important Note: When connecting to an existing spreadsheet, Google Forms always creates a new tab for its responses. It will not overwrite or append to an existing tab or range of cells you’ve already defined. This is a safety mechanism to prevent accidental data loss. If you need the data to appear in a specific tab or range, you’ll use advanced techniques like
IMPORTRANGEorQUERYin another tab, which we’ll cover next.
Advanced Data Management: Working with Your Connected Data
Once your Google Form is connected to a Google Sheet, the raw data begins to flow. But raw data, while valuable, isn’t always immediately useful for reporting or complex analysis. This is where Google Sheets’ advanced features come into play, allowing you to manipulate, filter, and summarize your form responses.
Understanding Your Response Sheet Structure
When a Google Form connects to a Google Sheet, it creates a new tab (e.g., “Form Responses 1“). This tab serves as the direct conduit for your form submissions.
- Each row represents a single form submission.
- The first column (
A) is always theTimestamp, recording when the response was submitted. - Subsequent columns correspond directly to your form questions, in the order they appear in your form.
It’s crucial to understand that you should generally avoid directly editing the “Form Responses 1” tab. Any manual changes, deletions of rows or columns, or insertions can interfere with how new form submissions are recorded. Instead, treat this tab as a read-only source and perform all your data manipulation in separate tabs.
Using IMPORTRANGE for Cross-Sheet Data (Advanced)
One of the most powerful ways to work with your form response data without disturbing the original “Form Responses 1” tab is to use the IMPORTRANGE function. This allows you to import data from one Google Sheet into another, or even from one tab to another within the same Google Sheet.
Setting Up IMPORTRANGE
-
Create a New Tab: In your connected Google Sheet (or a completely separate Google Sheet if preferred), create a new tab. Name it something descriptive, like “Processed Data” or “Dashboard Source“.
-
Insert the
IMPORTRANGEFormula: In cell A1 of your new tab, type theIMPORTRANGEformula. The basic syntax is:
=IMPORTRANGE("spreadsheet_url", "sheet_name!range_string")Let’s break down the components:
"spreadsheet_url": This is the full URL of the Google Sheet containing your “Form Responses 1” tab. You can copy this directly from your browser’s address bar. Make sure it’s enclosed in double quotes."sheet_name!range_string": This specifies which tab and what range of cells you want to import. For example,"Form Responses 1!A:Z"would import all data from column A to column Z from the “Form Responses 1” tab. UsingA:Z(orA:ZZfor more columns) ensures that as new responses come in, they are automatically included. Again, enclosed in double quotes.
Example:
Let’s say your form responses are in a sheet with the URLhttps://docs.google.com/spreadsheets/d/1ABCdefGHIJ_KLMNO/editand the responses are on the tab “Form Responses 1”. Your formula would look like this:
=IMPORTRANGE("https://docs.google.com/spreadsheets/d/1ABCdefGHIJ_KLMNO/edit", "Form Responses 1!A:Z") -
Granting Access: The first time you use
IMPORTRANGEto pull data from a specific spreadsheet, you will see a#REF!error with a prompt to “Allow access”. Click on this to grant permission. This only needs to be done once per source spreadsheet.
Now, your “Processed Data” tab will automatically display all the data from “Form Responses 1”. Any new submissions to your Google Form will instantly appear in “Form Responses 1”, and then, almost simultaneously, in your “Processed Data” tab via
IMPORTRANGE.
Tip: Always use
IMPORTRANGEfrom the original form response sheet if you plan to do any complex data cleaning or analysis. This keeps your raw data pristine and allows you to experiment freely in your processing tab.
Leveraging QUERY for Dynamic Reports
Once you have your data flowing into a processing tab (either directly or via IMPORTRANGE), the QUERY function becomes your best friend. QUERY is like a mini-database language (SQL-like) built right into Google Sheets, allowing you to filter, sort, aggregate, and transform your data with incredible power and flexibility.
Basic QUERY Syntax
The basic syntax for QUERY is:
=QUERY(data, "select_clause [where_clause] [group_by_clause] [pivot_clause] [order_by_clause] [limit_clause] [offset_clause] [label_clause] [format_clause]", [headers])
The most common parts you’ll use are:
data: This is the range where your data resides. For instance, if yourIMPORTRANGEis inA:Zof “Processed Data“, yourdatawould beProcessed Data!A:Z."select_clause": This is where you specify what columns you want to display and any aggregations.select *: Selects all columns.select Col1, Col3, Col5: Selects specific columns. Note thatQUERYrefers to columns asCol1,Col2,Col3, etc., notA,B,C, when used within the query string itself.select Col2, count(Col1): Selects column 2 and counts the entries in column 1.
"[where_clause]": This filters your data based on specific criteria.where Col2 = 'Marketing'where Col3 > 100where Col4 starts with 'A'
[headers]: An optional number indicating how many header rows are in yourdatarange. Usually1for most datasets.
Practical Examples with QUERY
Let’s assume your “Processed Data” tab contains the form responses, with Col1 being Timestamp, Col2 being “Department”, Col3 being “Sales Amount”, and Col4 being “Product Category”.
-
Filter responses for a specific department:
To see all responses only from the “Marketing” department:
=QUERY('Processed Data'!A:Z, "SELECT * WHERE Col2 = 'Marketing'", 1) -
Summarize total sales per product category:
This usesGROUP BYto aggregate data.
=QUERY('Processed Data'!A:Z, "SELECT Col4, SUM(Col3) GROUP BY Col4 LABEL SUM(Col3) 'Total Sales'", 1)
This formula will create a small table showing each product category and the sum of sales amounts for that category. -
Count submissions by date (daily activity report):
IfCol1is yourTimestampand you want to see how many submissions you got each day:
=QUERY('Processed Data'!A:Z, "SELECT TO_DATE(Col1), COUNT(Col1) GROUP BY TO_DATE(Col1) LABEL TO_DATE(Col1) 'Date', COUNT(Col1) 'Submissions'", 1)
TheTO_DATEfunction extracts just the date part from the timestamp.
These QUERY examples demonstrate how you can go beyond just displaying data to performing complex aggregations and creating dynamic reports, all automatically updating as new form responses come in.
Automating Calculations and Visualizations
Beyond IMPORTRANGE and QUERY, Google Sheets offers a plethora of ways to automate calculations and visualize your data, building on the foundation of your connected form responses.
- Calculated Columns: In your “Processed Data” tab (or another dedicated calculation tab), you can add new columns that perform calculations based on your form data.
- Example: If your form captures
Quantity (Col5)andUnit Price (Col6), you can add a column (say,Col7) forTotal Pricewith the formula:=ARRAYFORMULA(IF(ISBLANK(B:B), "", C:C * D:D)). ThisARRAYFORMULAwill automatically apply the multiplication for every row as new data is added, without you dragging the formula down.
- Example: If your form captures
- Pivot Tables: For quick summaries and cross-tabulations, Pivot Tables are invaluable.
- Select your data range (e.g.,
Processed Data!A:Z). - Go to Insert > Pivot table.
- Configure your rows, columns, values, and filters to generate insightful summaries. For instance, you could pivot to see average sales per region or count of respondents by age group.
- Select your data range (e.g.,
- Charts and Graphs: Visualizing data makes it much easier to understand trends and share insights.
- Select the data you want to visualize (this could be your
QUERYoutput or a pivot table). - Go to Insert > Chart.
- Google Sheets’ Chart Editor will guide you in choosing the appropriate chart type (bar, pie, line, scatter) and customizing its appearance. These charts will update automatically as your underlying data changes.
- Select the data you want to visualize (this could be your
By combining Google Forms with these advanced Google Sheets features, you create a powerful, automated data workflow that reduces manual effort and maximizes your analytical capabilities.
Common Issues and Troubleshooting
Even with the seamless integration of Google Forms and Google Sheets, you might occasionally encounter hiccups. Knowing how to diagnose and fix these common issues will save you time and frustration.
Form Not Updating in Sheet
Problem: You’ve submitted new responses, but they aren’t appearing in your connected Google Sheet.
Possible Causes & Solutions:
- Connection Broken: Sometimes the link can be inadvertently broken.
- Fix: Go back to your Google Form’s Responses tab. Click the green Sheets icon. If it says “Unlink form,” then it’s currently connected. If it gives you the options to “Create a new spreadsheet” or “Select existing spreadsheet,” the link is broken. Re-establish the connection by selecting your existing sheet.
- Too Many
IMPORTRANGEcalls (if applicable): If you’re usingIMPORTRANGEextensively across many sheets, there might be a slight delay.- Fix: Give it a few minutes. Google Sheets eventually catches up.
- Network Issues: Temporary internet connectivity problems can delay sync.
- Fix: Check your internet connection.
IMPORTRANGE Permissions Error (#REF!)
Problem: Your IMPORTRANGE formula shows #REF! and says “You need to connect these sheets.”
Possible Causes & Solutions:
- Access Not Granted: This is the most common reason.
- Fix: As mentioned earlier, click on the
#REF!cell, and a blue button will appear, usually saying “Allow access.” Click this button to grant the necessary permissions. This step only needs to be done once per unique source spreadsheet.
- Fix: As mentioned earlier, click on the
- Incorrect URL or Range: A typo in the
spreadsheet_urlorsheet_name!range_stringwill also result in an error.- Fix: Double-check the URL (ensure it’s the full URL, not just the ID) and the sheet name/range for accuracy. Remember, sheet names are case-sensitive.
Data Type Mismatches
Problem: Numerical data (like currency or quantities) from your form is appearing as text in your sheet, preventing calculations.
Possible Causes & Solutions:
- Form Question Type: Sometimes the way a question is phrased or the question type itself in Google Forms can lead to data being interpreted as text. For example, if you allow text in a number field or have extra symbols.
- Fix: In Google Forms, ensure your question types are appropriate (e.g., “Short answer” with response validation for numbers). In Google Sheets, you can use functions like
VALUE()orN()to convert text to numbers in a separate column:=ARRAYFORMULA(VALUE(B:B)). You can also clean data usingREGEXREPLACEto remove unwanted characters before conversion.
- Fix: In Google Forms, ensure your question types are appropriate (e.g., “Short answer” with response validation for numbers). In Google Sheets, you can use functions like
Accidental Deletion of Rows/Columns
Problem: You or a collaborator accidentally deleted a row or column in the “Form Responses 1” tab, and now new submissions are misaligned or not appearing.
Possible Causes & Solutions:
- Direct Editing of Response Tab: This is why it’s critical to treat “Form Responses 1” as read-only.
- Fix:
- Undo (if recent): If the deletion was very recent, use Edit > Undo or
Ctrl+Z(Cmd+Z on Mac) multiple times to revert. - Version History: Google Sheets has robust version history. Go to File > Version history > See version history and restore a previous version of the sheet before the deletion occurred.
- Unlink and Relink: As a last resort, if the data is irretrievable or badly corrupted, you can unlink the form from the sheet (via the Responses tab in Google Forms) and then relink it to the same sheet. This will create a new “Form Responses” tab (e.g., “Form Responses 2”) with a fresh, undamaged connection. However, any historical data in the old tab would need to be manually copied over if desired.
- Undo (if recent): If the deletion was very recent, use Edit > Undo or
- Fix:
Important Note: Always make a backup copy of your Google Sheet before making significant structural changes or when troubleshooting complex issues. Go to File > Make a copy.
Conclusion: Harnessing the Power of Automated Data
Congratulations! You’ve learned how to connect Google Forms to Google Sheets automatically, a fundamental skill that dramatically enhances your data collection and analysis capabilities. From the initial, simple linking of a form to a new spreadsheet, to the more advanced techniques of using IMPORTRANGE and QUERY for dynamic reporting and analysis, you now have the tools to manage your data with greater efficiency and insight.
This automated workflow isn’t just about saving time; it’s about empowering you to make data-driven decisions faster and with more confidence. Whether you’re an office professional tracking project metrics, a student gathering survey data for a research project, or an educator managing assignments, integrating Google Forms with Google Sheets provides a robust, scalable solution. Embrace this powerful combination, and unlock a world where your data works for you, effortlessly and intelligently.
Frequently Asked Questions (FAQ)
Q1: Can I connect multiple Google Forms to one Google Sheet?
A1: Yes, absolutely! You can link multiple Google Forms to a single Google Sheet. Each form will create its own dedicated tab (e.g., “Form Responses 1”, “Form Responses 2”) within that master Google Sheet. This is excellent for consolidating related data into one central workbook.
Q2: What happens if I edit data directly in the connected Google Sheet’s “Form Responses” tab?
A2: It’s generally not recommended to edit data directly in the “Form Responses” tab. If you modify or delete cells, rows, or columns in this tab, new form submissions might appear in the wrong places, or the form’s ability to record data accurately could be disrupted. Treat this tab as a read-only source. Instead, use IMPORTRANGE or copy the data to a separate tab for all your editing and analysis.
Q3: How do I disconnect a Google Form from a Google Sheet?
A3: To disconnect:
- Open your Google Form.
- Go to the Responses tab.
- Click on the three vertical dots (More options) next to the green Google Sheets icon.
- Select “Unlink form”.
This will stop new responses from flowing into the sheet, but existing data in the sheet will remain untouched. You can always relink it later if needed.
Q4: Can I use Google Apps Script to further automate this?
A4: Yes, Google Apps Script offers advanced automation possibilities! You can write scripts to:
- Automatically send email notifications on new submissions.
- Process data in specific ways (e.g., format values, move data to other tabs) when a form is submitted (using an
onFormSubmittrigger). - Create custom reports or dashboards.
- Perform data validation beyond what the form offers.
This requires some coding knowledge but opens up a world of customization.
Q5: Will my existing data in Google Forms be transferred to Google Sheets when I connect them?
A5: Yes! When you connect a Google Form to a Google Sheet (whether a new or existing one), all existing responses that were collected before the connection was made will be automatically transferred to the new “Form Responses” tab in your Google Sheet. From that point forward, all new submissions will also be added automatically.
See more: How to Connect Google Forms to Google Sheets Automatically.
Discover: AskByteWise.