
Hello, I’m Noah Evans, your guide from AskByteWise.com, where our mission is “Making Complex Tech Simple.” Today, we’re tackling a topic that strikes a mix of excitement and fear in many website owners: updating WordPress. You see, keeping your WordPress site up-to-date is crucial for its security, performance, and access to the latest features. But doing it incorrectly can lead to headaches, broken sites, and even data loss. This comprehensive tutorial will walk you through The Safe Way to Update WordPress, Themes, and Plugins, ensuring your website remains healthy, secure, and fully functional. Let’s get started and make updating a smooth, stress-free process.
Why Updating WordPress is Non-Negotiable (and Why “Safe” Matters)
Think of your WordPress website like your home. Over time, new security systems are developed, appliances get efficiency upgrades, and sometimes, you just want to redecorate with a fresh coat of paint. Ignoring these updates for your home would leave it vulnerable, less efficient, and potentially outdated. Your WordPress site is no different.
Here’s why regular updates are absolutely essential:
- Security Patches: This is the big one. WordPress, themes, and plugins are constantly scrutinized by security researchers and malicious actors. Updates often include critical fixes for vulnerabilities that could otherwise allow hackers to compromise your site, steal data, or inject malware. Running outdated software is like leaving your front door unlocked.
- Performance Improvements: Developers are always looking for ways to make their code run faster and more efficiently. Updates can bring significant speed optimizations, leading to a better user experience and even improved SEO rankings.
- New Features & Enhancements: Updates aren’t just about fixing bugs; they also introduce exciting new functionalities. Whether it’s a new block in the WordPress editor, a powerful option in your e-commerce plugin, or improved customization for your theme, updates unlock the full potential of your site.
- Compatibility: As WordPress core evolves, themes and plugins must keep pace. Outdated components can lead to compatibility issues, causing features to break, styling to go awry, or even your entire site to crash. Keeping everything updated ensures all parts of your website work harmoniously.
Now, why does it matter to do it “the safe way”? Because blindly clicking “Update Now” can sometimes lead to unforeseen conflicts, a broken layout, or the dreaded “White Screen of Death” (WSOD). Our goal is to equip you with a robust process that minimizes these risks.
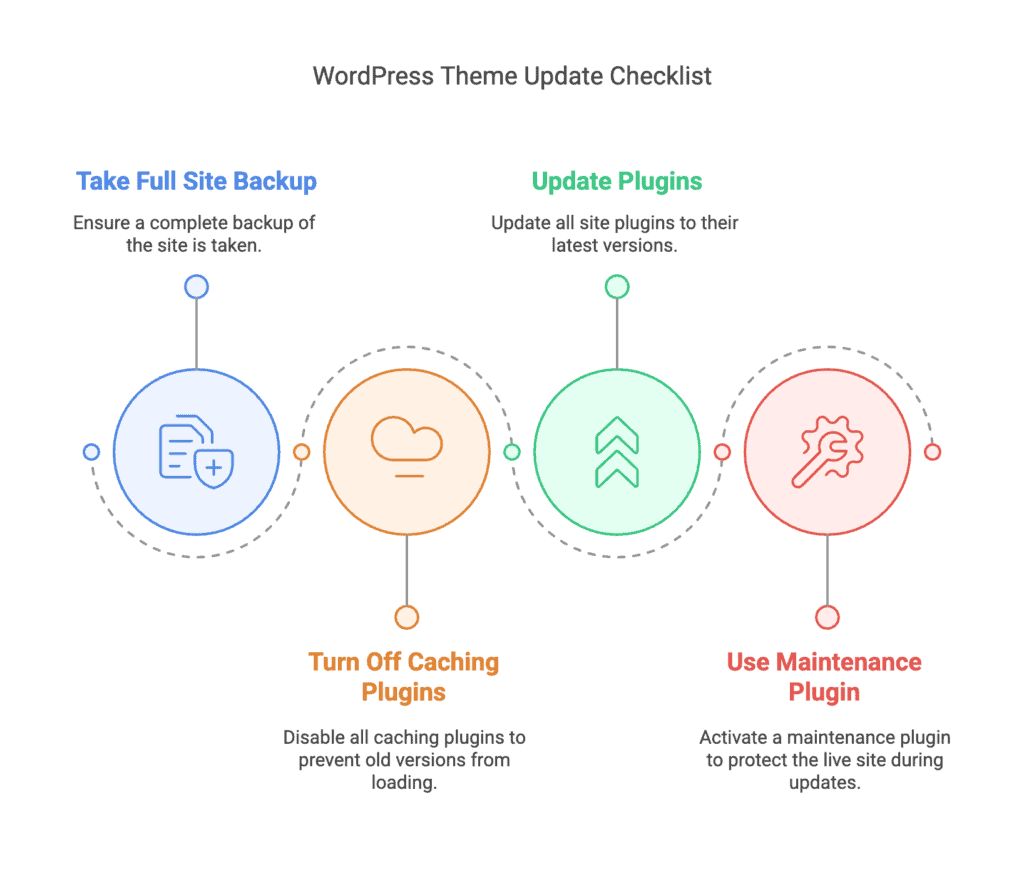
Before You Begin: The Essential Pre-Update Checklist
Before we even think about clicking an update button, we need to lay some groundwork. This checklist is your safety net, your insurance policy against things going wrong. Don’t skip these steps!
1. The Golden Rule: Back Up Your Entire Site
This is non-negotiable. A full backup is your ultimate undo button. If anything goes wrong during an update, you can simply restore your site to its previous, working state.
-
What to Back Up:
- WordPress Files: These are all the folders and files that make up your WordPress installation – the core WordPress files, your themes, plugins, images, and any custom code.
- WordPress Database: This is where all your dynamic content lives – posts, pages, comments, user information, plugin settings, and much more. It’s the brain of your website.
-
How to Back Up Your Site:
- Via Your Hosting Provider: Many web hosts (like SiteGround, Bluehost, WP Engine) offer one-click backup solutions directly from your cPanel or hosting dashboard. This is often the easiest method for beginners. Look for options like “Backups,” “Backup Wizard,” or “Staging/Backup.”
- Using a WordPress Backup Plugin: This is highly recommended for its convenience and control.
- Navigate to your WordPress dashboard, go to Plugins > Add New, and search for “backup.”
- UpdraftPlus WordPress Backup Plugin is a popular, reliable choice. Install and activate it.
- Follow the plugin’s instructions to create a complete backup (files and database). Ensure you download the backup files to your local computer or store them on a cloud service like Google Drive or Dropbox.
- WP-Optimize – Clean, Compress, Cache also offers robust backup features as part of its suite.
- Manually via FTP and phpMyAdmin: For more advanced users, you can manually download your WordPress files using an FTP client (like FileZilla) and export your database using phpMyAdmin (accessible through your hosting cPanel).
Best Practice: After creating a backup, always verify that the backup files are complete and stored in a safe, accessible location. You don’t want to find out your backup failed after your site breaks.
2. Prepare Your Digital Workbench: Staging Site (Optional but Recommended)
Imagine you’re remodeling your kitchen. Would you rip everything out on a whim, or would you sketch out your plans, perhaps even build a mock-up, to ensure everything works before making permanent changes? A staging site is your “mock-up” – a clone of your live website where you can test updates and changes without affecting your visitors.
-
What is a Staging Site? It’s a private, duplicate version of your entire website that resides on a separate subdomain (e.g.,
staging.yourdomain.com) or a local development environment. It’s not indexed by search engines, so you don’t have to worry about duplicate content issues. -
How to Create a Staging Site:
- Hosting Provider Feature: Many managed WordPress hosts (e.g., WP Engine, Kinsta, SiteGround) offer one-click staging environment creation. This is the simplest method.
- Plugin Solutions: Plugins like WP Staging – WordPress Staging Plugin allow you to create a staging site directly within your WordPress dashboard.
- Manual Creation: This involves more technical steps, including creating a subdomain, copying files via FTP, and importing the database. Generally not recommended for beginners.
-
Benefits of a Staging Site:
- Zero Downtime Risk: Updates happen on the staging site; your live site remains untouched.
- Safe Testing Ground: You can identify and fix any issues (broken layouts, plugin conflicts) before they ever reach your actual users.
- Confidence: You can proceed with live updates knowing exactly what to expect.
3. Check Compatibility & Release Notes
Before updating, do a quick check to see if there are any known compatibility issues.
- For Plugins and Themes: Visit the plugin/theme page on WordPress.org or the developer’s official website. Look for a “Last Updated” date, “Tested with WordPress version,” and read recent reviews or support forum threads. Developers often announce upcoming changes or potential conflicts.
- For WordPress Core: Always read the official WordPress release notes. These highlight major changes, deprecated functions, and any specific considerations you might need to take into account.
4. Clear Your Cache
Before initiating updates, it’s a good idea to clear all caches on your site. This includes:
- Your WordPress Caching Plugin: (e.g., WP Super Cache, W3 Total Cache, LiteSpeed Cache)
- Your Hosting-level Cache: Many hosts have their own caching mechanisms.
- CDN Cache: If you’re using a Content Delivery Network (like Cloudflare).
Clearing the cache ensures that when you test your site after updates, you’re seeing the absolute latest version, not an old cached copy that might mask issues.
5. Disable Non-Essential Plugins
For significant updates, particularly of the WordPress core, temporarily deactivating non-critical plugins can help isolate issues if something goes wrong. If your site breaks, you’ll know it’s less likely due to a plugin conflict and more likely the core update itself (or the few active plugins). Remember to re-enable them after the core update.
Step-by-Step: The Safe Way to Update WordPress, Themes, and Plugins
With your backups secured and your pre-update checks complete, you’re ready to start the updating process. We’ll tackle these in a specific order to minimize potential conflicts.
1. Update Plugins First (One by One)
Plugins are often the most frequent update recipients. Updating them individually allows you to immediately identify if a specific plugin is causing an issue.
-
Navigate to Plugins: From your WordPress dashboard, go to Plugins > Installed Plugins.
-
Identify Updates: You’ll see a notification next to any plugin that has an available update.
-
Update Individually: Click “Update Now” for one plugin at a time.
-
Test Thoroughly: After each plugin update, immediately visit your website’s front end (open a new incognito/private browser window to avoid caching issues) and navigate through several pages. Check any functionality related to that specific plugin (e.g., if you updated a contact form plugin, test your contact form).
-
Repeat: Continue this process, updating one plugin, then testing, until all plugins are updated.
Warning: If you update a plugin and your site breaks, immediately restore your backup or use your staging site to diagnose the issue. Do not proceed with further updates until the problem is resolved.

2. Update Themes
Once your plugins are good to go, it’s time for themes. If you’re using a child theme (which you should be if you’ve made custom code changes), updating the parent theme is usually safe as your customizations are preserved in the child theme.
-
Navigate to Themes: From your WordPress dashboard, go to Appearance > Themes.
-
Identify Updates: Any themes with available updates will show a notification.
-
Update: Click “Update Now” for each theme.
-
Test Thoroughly: After updating, visit your website’s front end. Check pages, posts, and especially any areas where you might have custom CSS or layout adjustments. Ensure everything looks as it should.
Best Practice: If you’re not using a child theme and have made direct edits to your theme’s files (e.g.,
functions.php,style.css), be aware that updating the theme will overwrite these changes. Always use a child theme for customizations, or keep a separate record of your custom code.
3. Update WordPress Core
This is the big one. WordPress core updates often bring the most significant changes.
-
Navigate to Updates: From your WordPress dashboard, go to Dashboard > Updates.
-
Initiate Update: You’ll see a section for WordPress updates. Click the “Update to version X.X.X” button.
-
Automatic vs. Manual: WordPress often handles minor updates automatically in the background. For major version releases (e.g., 5.x to 6.x), you’ll typically see a manual update prompt.
-
Wait for Completion: WordPress will go into “maintenance mode” briefly. Do not close your browser or navigate away until the update process is complete.
-
Test Thoroughly: Once the update is finished, visit your website’s front end and backend. Check all key functionalities, forms, navigation, user logins, and post/page editing. Ensure everything is working correctly.
Warning: If your site gets stuck in maintenance mode (displaying “Briefly unavailable for scheduled maintenance”), it usually means the update process was interrupted. You’ll need to use FTP to delete the
.maintenancefile from your WordPress root directory.
4. Re-enable Plugins and Clear Cache (Again)
If you disabled any non-essential plugins earlier, now is the time to reactivate them.
- Re-enable Plugins: Go to Plugins > Installed Plugins and activate any plugins you temporarily deactivated.
- Clear All Caches: Go back to your caching plugin settings (or hosting control panel/CDN settings) and perform a full cache clear. This ensures that the new, updated files are being served to your visitors.

Post-Update Checklist: Ensuring Everything Works Smoothly
You’ve updated everything, but your job isn’t quite done. A thorough post-update check is crucial.
- Browse Your Entire Site: Click through your main navigation, visit a variety of pages, posts, and custom post types. Check footers, headers, and sidebars.
- Test Key Functionalities:
- Forms: Submit your contact forms.
- E-commerce: If you run an online store, go through the entire purchase process from adding to cart to checkout.
- User Login/Registration: Test if users can log in, register, or reset passwords.
- Interactive Elements: Test sliders, carousels, pop-ups, and any JavaScript-driven features.
- Admin Area: Ensure you can still edit posts, pages, and navigate the dashboard without issues.
- Check Responsive Design: Briefly view your site on a mobile device or use your browser’s developer tools to simulate mobile views.
- Check Error Logs: If you notice any unusual behavior or encounter errors, check your server’s error logs (usually accessible via your hosting cPanel) or enable WordPress debugging (see troubleshooting below) for more insights.
Troubleshooting Common WordPress Update Issues
Even with the safest approach, sometimes things go sideways. Don’t panic! Most common issues have straightforward solutions.
White Screen of Death (WSOD)
This is perhaps the most frightening error: your site is just a blank white page. It usually means there’s a fatal PHP error.
-
Diagnosis:
- Enable Debugging: Edit your
wp-config.phpfile (located in your WordPress root directory, via FTP or file manager). Add or modify these lines:define( 'WP_DEBUG', true ); define( 'WP_DEBUG_LOG', true ); // Logs errors to wp-content/debug.log define( 'WP_DEBUG_DISPLAY', false ); // Prevents errors from showing on live site @ini_set( 'display_errors', 0 );Then, refresh your site. Check your
wp-content/debug.logfile via FTP. The error message will often point to a specific plugin or theme file. - Deactivate Plugins: If debugging doesn’t immediately reveal the culprit, try deactivating all plugins via FTP. Navigate to
wp-content/pluginsand rename thepluginsfolder toplugins_old. This will deactivate all plugins. If your site comes back, reactivate plugins one by one through the dashboard to find the problem plugin. - Switch Theme: Similarly, if deactivating plugins doesn’t work, rename your active theme folder (in
wp-content/themes) to force WordPress to revert to a default theme (like Twenty Twenty-Four). If your site comes back, your theme is the issue.
- Enable Debugging: Edit your
-
Solution: Once you identify the problematic plugin or theme, try rolling it back to a previous version (if possible via the developer) or finding an alternative. If you have a backup, restore it.
Theme or Plugin Functionality Breaks
Specific features stop working (e.g., slider not sliding, custom CSS not applying).
-
Diagnosis:
- Plugin Conflict: If a feature broke after a plugin update, it’s likely a conflict. Deactivate other plugins one by one to isolate the one causing the conflict.
- Compatibility Issues: The updated component might not be compatible with your current WordPress version or another plugin/theme.
- Cache: Ensure all caches (browser, plugin, server, CDN) are completely cleared.
-
Solution: Revert the problematic plugin/theme to a previous version from your backup. Contact the developer for support, providing details of your WordPress, theme, and plugin versions.
“Briefly Unavailable for Scheduled Maintenance” Error
This happens when the update process doesn’t complete cleanly, and WordPress gets stuck in maintenance mode.
- Diagnosis: Check your WordPress root directory (via FTP or file manager) for a file named
.maintenance(note the dot). - Solution: Delete this
.maintenancefile. Your site should immediately return to normal.
Internal Server Error (500 Error)
Similar to WSOD, this indicates a server-side issue.
-
Diagnosis:
.htaccessFile: A corrupted.htaccessfile is a common culprit. Via FTP, rename your.htaccessfile to something like.htaccess_old. If your site comes back, go to Settings > Permalinks in your dashboard and simply click “Save Changes” to generate a new.htaccessfile.- PHP Memory Limit: Your site might be running out of memory.
- Edit your
wp-config.phpfile and add this line:define('WP_MEMORY_LIMIT', '256M');(or 512M). - Alternatively, edit your
php.inifile or ask your host to increase thememory_limit.
- Edit your
-
Solution: Follow the diagnostic steps. If the issue persists, contact your hosting provider.
Visual Glitches (CSS/JS issues)
Your layout looks broken, styles are missing, or JavaScript functionalities fail.
-
Diagnosis:
- Clear Caches: This is the most common reason. Clear your browser cache, your WordPress caching plugin’s cache, and any server-side or CDN cache.
- Theme Update: If you updated your theme, check if any custom CSS was overwritten (if you weren’t using a child theme).
- Console Errors: Use your browser’s developer tools (usually F12, then look at the “Console” tab) to check for JavaScript errors.
-
Solution: Clear all caches. If still broken, temporarily switch to a default WordPress theme (like Twenty Twenty-Four) to see if the issue is theme-related. Restore your backup if necessary.
Conclusion: Embrace Regular, Safe Updates
Congratulations! You’ve successfully navigated The Safe Way to Update WordPress, Themes, and Plugins. You now understand not just how to update, but why it’s so important and how to protect yourself from potential issues.
Regular, safe updates are the cornerstone of a healthy, secure, and high-performing WordPress website. By following this comprehensive guide, you’re not just maintaining your site; you’re actively safeguarding it, improving its functionality, and ensuring a smooth experience for your visitors. Make this process a regular part of your website management routine, and you’ll reap the rewards of a robust online presence.
Next Steps for a Resilient WordPress Site
- Automate Backups: Don’t just do manual backups before updates. Set up a reliable, automated backup schedule using a plugin like UpdraftPlus or your hosting provider’s service.
- Embrace Staging: For any significant changes or major WordPress core updates, always test on a staging environment first. It’s an invaluable safety net.
- Stay Informed: Subscribe to the official WordPress news blog or follow reputable WordPress news sites to stay informed about upcoming releases and potential issues.
Frequently Asked Questions (FAQ)
Q1: How often should I update WordPress, themes, and plugins?
A1: You should update as soon as updates are available. For WordPress core, minor releases (e.g., 6.4.1 to 6.4.2) often update automatically. Major releases (e.g., 6.3 to 6.4) are manual. Themes and plugins should be updated immediately when notifications appear, after following the safe update process. Prompt updates are crucial for security.
Q2: Can I skip updates if my site is working fine?
A2: While it might seem convenient, skipping updates is a dangerous practice. You’ll miss out on critical security patches, performance improvements, and new features. An outdated site is a vulnerable site, significantly increasing the risk of being hacked or experiencing compatibility issues down the line. It’s always best to update, following the safe procedure outlined above.
Q3: What if I don’t see an update notification for a plugin or theme?
A3: If a plugin or theme has an update available but you don’t see a notification, it could be for a few reasons:
- Premium Plugin/Theme: If purchased from a marketplace like ThemeForest or CodeCanyon, you might need to manually download the updated version and upload it (or ensure your license is connected to enable automatic updates).
- Caching Issue: Clear your caches and refresh your dashboard.
- Inactive Plugin/Theme: Updates only show for active items.
- Developer Lag: The developer might be slow to push the update notification.
Q4: Is it safe to update a live site without a staging site?
A4: While many small sites update directly without a staging environment, it carries inherent risks. For critical business websites or sites with complex functionalities, always use a staging site. For personal blogs or very simple sites, you can update directly, but you absolutely must have a full, verified backup beforehand. A staging site offers peace of mind and minimizes downtime.
Q5: What’s the biggest mistake beginners make when updating WordPress?
A5: The biggest mistake by far is updating without first creating a complete, verified backup. Without a backup, if something goes wrong, you could lose your entire website or spend countless hours trying to fix issues, potentially leading to costly developer fees. Always, always, always back up your site first!
See more: The Safe Way to Update WordPress, Themes, and Plugins.
Discover: AskByteWise.