
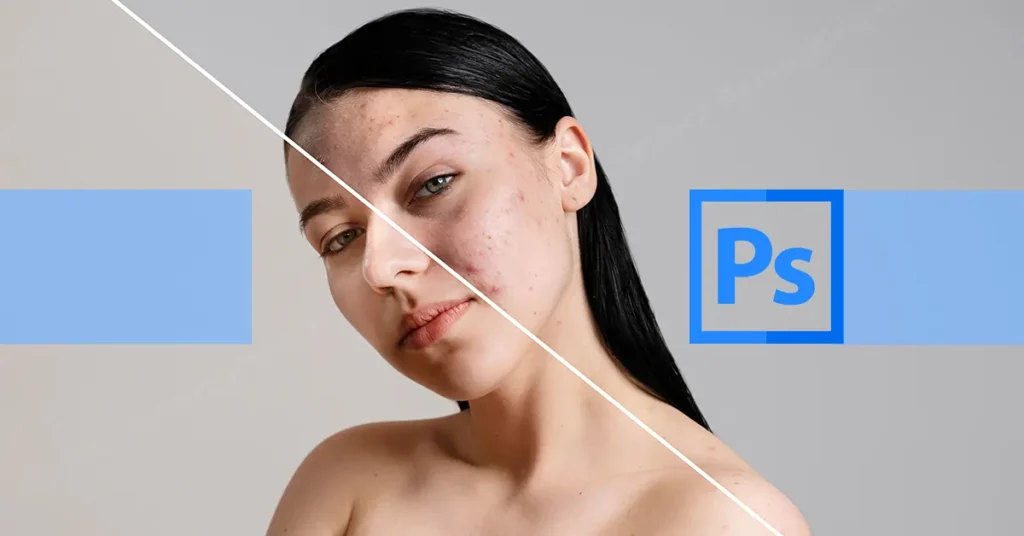
Ever wondered how professional photographers achieve that flawless, yet natural-looking skin in their portraits? It’s not magic, it’s meticulous technique combined with the power of Adobe Photoshop! Learning how to retouch and smooth skin professionally in Photoshop is a game-changer for anyone looking to elevate their portrait photography or digital art. This comprehensive guide from AskByteWise.com will take you from a raw image to a beautifully refined portrait, teaching you the industry-standard methods that ensure your subjects look their absolute best, without looking overly “plastic” or artificial. By the end of this tutorial, you’ll be able to confidently enhance skin texture, even out tones, and add a subtle glow, transforming your images with professional-grade precision.
What You’ll Need
Before we dive into the exciting world of digital retouching, make sure you have the following:
- Adobe Photoshop: This tutorial is written using Photoshop CC 2024, but most of the techniques are applicable to recent versions of Photoshop (CC 2020 and later).
- A Portrait Image: Choose an image with clear skin that you’d like to improve. It’s best to start with a high-resolution photo for the most detailed work.
- A Mouse or Graphics Tablet: While a mouse is sufficient, a graphics tablet (like a Wacom Intuos or Cintiq) offers much greater precision and control, especially for brush-based work.
The Foundation: How to Retouch and Smooth Skin Professionally in Photoshop with Basic Techniques
Our journey begins with foundational cleanup, addressing blemishes and distractions, then moves into a classic, accessible method for smoothing skin. This initial pass lays the groundwork for more advanced techniques.
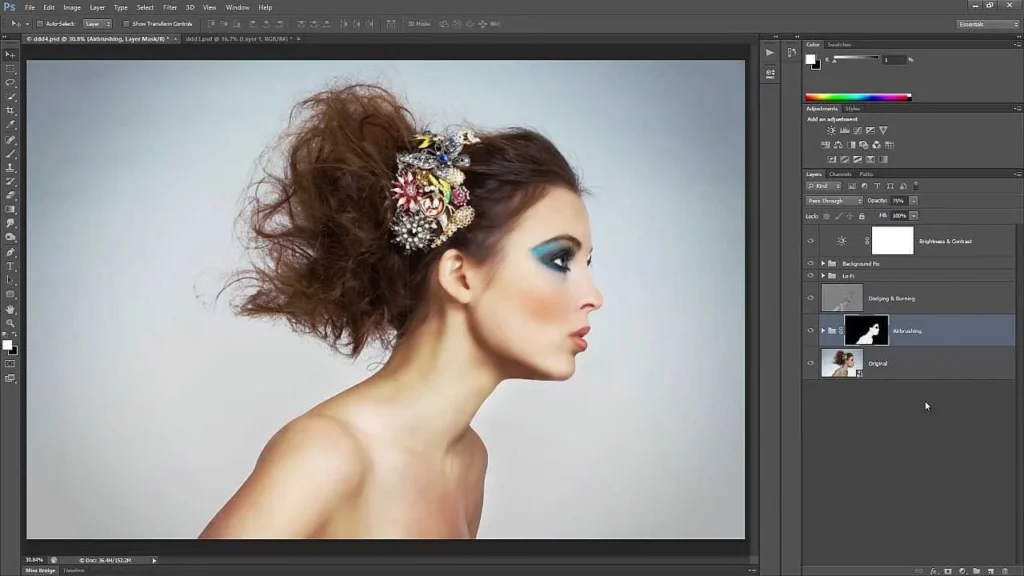
Step 1: Prepare Your Workspace and Image
Before any editing begins, it’s crucial to set up your environment for efficient work.
- Open Your Image: Navigate to File > Open… and select the portrait you wish to retouch. Click Open.
- Duplicate Your Background Layer: To ensure non-destructive editing (meaning you can always revert to your original image), always work on duplicate layers. Press Ctrl+J (Windows) or Cmd+J (Mac) to duplicate your Background layer. Rename this new layer “Clean Up” by double-clicking its name in the Layers panel.
- Adjust Zoom for Detail: Zoom in to about 100-200% to clearly see skin imperfections. You can do this by pressing Ctrl++ (Windows) or Cmd++ (Mac), or by selecting the Zoom Tool (Z) from the Tools panel and clicking on the area you want to magnify.
Step 2: Initial Blemish Removal with the Healing Tools
This is where we tackle obvious blemishes, stray hairs, and minor imperfections. Think of it as tidying up the canvas.
- Select the Spot Healing Brush Tool: From the Tools panel, select the Spot Healing Brush Tool (J). This tool is fantastic for quickly removing small, isolated imperfections. Ensure “Content-Aware” is selected in the Options bar at the top.
- Adjust Brush Size: Use the left bracket key [ to decrease brush size and right bracket key ] to increase it. The brush should be slightly larger than the blemish you’re targeting.
- Click to Remove Blemishes: Simply click on any pimples, spots, or other minor distractions. Photoshop will intelligently sample surrounding pixels to blend the area seamlessly. Work systematically across the face.
- Use the Healing Brush Tool for Larger Areas: For slightly larger or more complex imperfections where you want more control over the source area, select the Healing Brush Tool (Shift+J until you find it).
- Alt-Click to Sample: Hold down Alt (Windows) or Option (Mac) and click on a clean area of skin adjacent to the blemish to sample it.
- Paint to Heal: Release Alt/Option and paint over the blemish. Photoshop will blend the sampled texture with the color and luminosity of the target area.
- Utilize the Patch Tool for Even Larger Areas: For larger skin irregularities or areas you want to replace, the Patch Tool (Shift+J until you find it) is incredibly useful.
- Select the Area: Use the Patch Tool to draw a selection around the problematic skin area.
- Drag to Sample: Click inside the selection and drag it to a clean, similar-textured area of skin. Release the mouse button, and the selected area will be replaced and blended.
Pro Tip: When using healing tools, always make sure your brush size is appropriate. A brush that’s too large can unintentionally remove desirable skin texture, leading to a blurry or fake appearance. Work in small, precise strokes.
Step 3: Gentle Skin Smoothing with Gaussian Blur (Non-Destructive Method)
Now that the major distractions are gone, let’s start smoothing out the skin while preserving natural texture. This method is excellent for beginners.
- Duplicate Your “Clean Up” Layer: Press Ctrl+J (Windows) or Cmd+J (Mac) on your “Clean Up” layer to create another duplicate. Rename this “Basic Smooth.”
- Apply Gaussian Blur: With the “Basic Smooth” layer selected, navigate to Filter > Blur > Gaussian Blur….
- A dialog box will appear. Adjust the Radius slider until the skin imperfections are mostly smoothed out, but don’t go so far that the skin looks completely blurry or plastic. For high-resolution images, a radius between 5-15 pixels is often a good starting point, but this will vary depending on your image resolution and desired effect. Click OK.

- A dialog box will appear. Adjust the Radius slider until the skin imperfections are mostly smoothed out, but don’t go so far that the skin looks completely blurry or plastic. For high-resolution images, a radius between 5-15 pixels is often a good starting point, but this will vary depending on your image resolution and desired effect. Click OK.
- Add a Black Layer Mask: This step is crucial for non-destructive editing and selective application. With the “Basic Smooth” layer still selected, hold down Alt (Windows) or Option (Mac) and click the Add Layer Mask icon (a rectangle with a circle inside) at the bottom of the Layers panel. This will add a black layer mask, hiding the entire blurred effect.
- Paint to Reveal the Smoothing:
- Select the Brush Tool (B).
- Ensure your Foreground Color is set to White. You can press D to reset to default colors (black foreground, white background), then X to swap them.
- Set the Opacity of your brush in the Options bar to around 30-50% and the Flow to 50-70%.
- With the layer mask thumbnail active (click on it if it’s not), carefully paint over the areas of the skin you want to smooth. Avoid painting over areas that should remain sharp, such as eyes, eyebrows, lips, nostrils, and hair. The lower opacity and flow allow for gradual build-up, giving you more control.
- Adjust Layer Opacity: If the smoothing effect is too strong even after selective painting, you can reduce the Opacity of the “Basic Smooth” layer itself in the Layers panel to blend it further with the original texture.
Pro Tip: Always zoom in and out while painting on the mask. Zooming out helps you see the overall effect, while zooming in allows for precise control around edges and details.
Advanced Skin Smoothing: The Frequency Separation Method
For a truly professional and natural result, understanding frequency separation is key. This technique allows you to modify skin texture and color/tone independently. It sounds complex, but it’s incredibly powerful and surprisingly straightforward once you grasp the concept. Think of it as separating the “detail” (high frequency) from the “color and tone” (low frequency) of your image.
Step 4: Setting Up Frequency Separation Layers
This setup is the most technical part, but follow these steps precisely.
- Duplicate the “Clean Up” Layer Twice: Select your “Clean Up” layer from Step 2. Press Ctrl+J (Windows) or Cmd+J (Mac) twice. You should now have two new layers above “Clean Up.”
- Rename the Layers:
- Rename the bottom of these two new layers “Low Frequency (Color/Tone).”
- Rename the top layer “High Frequency (Texture).”
- Isolate Low Frequency (Color/Tone):
- Select the “Low Frequency (Color/Tone)” layer.
- Navigate to Filter > Blur > Gaussian Blur….
- Here’s a critical step: Adjust the Radius until all fine skin texture is completely blurred out, but you can still recognize facial features and color transitions. You want to blur just enough to remove texture, but not so much that you lose the underlying shape of the face. A good starting point is usually between 8-20 pixels, but again, depends on image resolution. Click OK.
- Isolate High Frequency (Texture):
- Select the “High Frequency (Texture)” layer.
- Go to Image > Apply Image….
- In the Apply Image dialog box:
- For Layer, select “Low Frequency (Color/Tone).”
- For Blending, select Subtract.
- Set Scale to 2.
- Set Offset to 128.
- Ensure Invert is unchecked.
- Click OK.
- Now, change the Blending Mode of the “High Frequency (Texture)” layer in the Layers panel to Linear Light. Your image should now look virtually identical to how it did before you started the frequency separation setup. If it looks off, double-check your settings in Apply Image.


Step 5: Smoothing Skin Texture on the Low Frequency Layer
This is where we smooth out blotchiness, color shifts, and overall unevenness without touching the skin’s natural texture.
- Select the “Low Frequency (Color/Tone)” Layer: Make sure this layer is active in the Layers panel.
- Choose Your Smoothing Tool:
- The Mixer Brush Tool (buried under the Brush Tool, press Shift+B until you find it) is excellent for this. In the Options bar, set:
- Load the brush after each stroke: (small icon of a brush with a box next to it) Deselect this.
- Clean the brush after each stroke: (small icon of a brush with a box and an arrow) Select this.
- Wet: 5-10% (Controls how much paint is picked up)
- Load: 75-90% (Controls how much paint is on the brush)
- Mix: 5-10% (Controls how much color is mixed with existing colors)
- Flow: 50-70% (Controls how quickly paint is applied)
- Alternatively, the Gaussian Blur with a Layer Mask can also be used here, similar to Step 3, but applied specifically to this “Low Frequency” layer.
- The Mixer Brush Tool (buried under the Brush Tool, press Shift+B until you find it) is excellent for this. In the Options bar, set:
- Carefully Paint to Smooth: Use a soft-edged brush. Gently paint over areas where you want to smooth out color transitions, blotches, or shadows. Do not paint over texture areas like pores or fine lines on this layer. You’re essentially blending colors and tones without affecting the underlying detail. Work in small strokes, constantly sampling nearby areas if using the Mixer Brush.
- Consider the Lasso Tool with Gaussian Blur: For larger, more uniform areas of skin, you can use the Lasso Tool (L) to make a soft selection (set Feather to 10-20 pixels in the Options bar), then apply a small Gaussian Blur (Filter > Blur > Gaussian Blur) to just that selection on the “Low Frequency” layer. This is great for broad areas like cheeks or the forehead.
Step 6: Refining Texture on the High Frequency Layer
Now we address the actual skin texture – pores, fine lines, etc. – making it look better without losing realism.
- Select the “High Frequency (Texture)” Layer: This is where the magic happens for texture.
- Use Healing Tools: Select the Spot Healing Brush Tool (J) or Healing Brush Tool (J) again. These tools work wonderfully on this layer because they only affect the texture, leaving the underlying color and tone untouched. Use them to target any remaining stubborn blemishes, enlarged pores, or distracting fine lines that the low-frequency smoothing didn’t address.
- Adjust Opacity: If you feel the texture is still too strong or too soft, you can adjust the Opacity of the “High Frequency (Texture)” layer slightly. However, be cautious not to overdo this, as it can quickly lead to a plastic look.
Note: The beauty of frequency separation is that you can always go back and adjust either the color/tone or the texture independently, giving you ultimate control over the final look.
Refining Details and Color Correction
With the primary skin retouching complete, let’s enhance the overall image and add those final touches that make it truly shine.
Step 7: Adding Dimension with Dodging and Burning
Dodging and burning is a classic darkroom technique that allows you to subtly lighten (dodge) or darken (burn) areas of an image, enhancing contours and adding depth.
- Create a New Gray Layer for Non-Destructive Dodging/Burning: Press Shift+Ctrl+N (Windows) or Shift+Cmd+N (Mac) to create a new layer.
- Name it “Dodge & Burn.”
- Set Mode to Overlay.
- Check the box for “Fill with Overlay-neutral color (50% gray).” Click OK.
- Select Dodge and Burn Tools:
- Select the Dodge Tool (O) for lightening.
- Select the Burn Tool (O) for darkening.
- Set Tool Properties: In the Options bar:
- Set Range to Midtones (this is usually the safest for skin).
- Set Exposure to 5-15%. This allows for very gradual adjustments.
- Use a large, soft-edged brush.
- Subtly Paint:
- Dodge (lighten): Gently paint over areas you want to highlight, such as the top of the cheekbones, the bridge of the nose, the forehead, or under the eyes (sparingly).
- Burn (darken): Gently paint over areas you want to add depth to, such as under the cheekbones, along the jawline, or in the natural creases/shadows of the face.
- The goal is subtlety. Build up the effect slowly.

Step 8: Final Color Correction and Adjustment Layers
Adjustment layers are powerful, non-destructive tools for fine-tuning the colors and tones of your image.
- Add a Vibrance/Saturation Adjustment Layer: Click the Create new fill or adjustment layer icon (half-black, half-white circle) at the bottom of the Layers panel, and select Vibrance.
- Slightly increase Vibrance (e.g., +10 to +20) to boost muted colors, especially skin tones, without oversaturating.
- Slightly decrease Saturation (e.g., -5 to -10) if the skin looks too red or overly vibrant after dodging and burning.
- Add a Curves Adjustment Layer (Optional but Recommended): Another excellent adjustment layer for subtle contrast and tone control.
- Click the Create new fill or adjustment layer icon and select Curves.
- Gently create a subtle “S” curve by clicking on the line and dragging it slightly up in the mid-highlight area and slightly down in the mid-shadow area. This enhances contrast and gives your image more punch.
- You can also target individual color channels (Red, Green, Blue) for precise color balancing, for example, to reduce excessive redness in skin.
Note: Always place adjustment layers at the very top of your layer stack (except for global sharpening, which usually goes last) so they affect all layers below them.
Tips for Better Results
- Less is More: The most important rule in retouching. Over-retouched skin looks fake and distracts from the subject. Aim for subtle improvements that enhance natural beauty.
- Work Non-Destructively: Always use duplicate layers, layer masks, and adjustment layers. This preserves your original image and allows for endless adjustments.
- Zoom In, Zoom Out: Regularly switch between zoomed-in views (for detail work) and zoomed-out views (to check the overall impact of your edits).
- Take Breaks: Your eyes can get accustomed to changes. Step away from your screen for a few minutes, then come back with fresh eyes to spot areas you might have overdone.
- Reference Images: Look at professionally retouched photos for inspiration and to train your eye on what good skin retouching looks like.
- Practice Makes Perfect: Skin retouching is a skill that improves with consistent practice. Don’t be discouraged if your first attempts aren’t perfect!
Summary of Steps to Retouch and Smooth Skin Professionally in Photoshop
- Preparation: Open your image and duplicate the background layer for non-destructive editing.
- Initial Cleanup: Use the Spot Healing Brush, Healing Brush, and Patch Tool to remove major blemishes and distractions.
- Basic Smoothing: Create a blurred layer, add a black mask, and paint with a white brush at low opacity to gently smooth skin while preserving details.
- Frequency Separation Setup: Create “Low Frequency (Color/Tone)” and “High Frequency (Texture)” layers to separate detail from color.
- Low Frequency Smoothing: Use the Mixer Brush Tool or Lasso Tool with Gaussian Blur on the “Low Frequency” layer to even out skin tones and colors.
- High Frequency Refinement: Use the Healing Brush Tool on the “High Frequency” layer to fine-tune skin texture.
- Dodging and Burning: Create a 50% gray overlay layer and use the Dodge and Burn Tools to enhance dimension and contrast.
- Color Correction: Apply Vibrance/Saturation and Curves adjustment layers to fine-tune colors and overall tones.
By following these steps, you’ll be well on your way to mastering how to retouch and smooth skin professionally in Photoshop, creating stunning portraits that truly stand out.
Frequently Asked Questions (FAQ)
Q1: How can I make sure the skin doesn’t look too fake or “plastic” after smoothing?
The key to natural-looking results is subtlety and preserving original skin texture. Avoid over-blurring the low-frequency layer in frequency separation, and be very light-handed with your brush opacity when painting on masks or using the mixer brush. Always aim for “less is more.” Regularly toggle your layer visibility on and off (by clicking the eye icon next to the layer) to compare before and after, ensuring you’re not overdoing it.
Q2: What’s the biggest difference between the Gaussian Blur method and Frequency Separation?
The Gaussian Blur method (Step 3) is a simpler, quicker approach where you blur the entire skin area and then use a mask to reveal the effect selectively. While effective for general smoothing, it can sometimes reduce desirable texture if not carefully masked. Frequency Separation (Steps 4-6) is a more advanced technique that separates the image into color/tone (low frequency) and texture (high frequency) layers. This allows you to work on each aspect independently, giving you far greater control to smooth colors without losing texture, and refine texture without affecting colors, leading to more natural and professional results.
Q3: Can I use these techniques for male skin retouching as well?
Absolutely! The core principles of how to retouch and smooth skin professionally in Photoshop apply to all genders. However, for male subjects, you often want to be even more subtle with smoothing and preserving skin texture, as a completely “smooth” look might appear less masculine or natural. Pay close attention to facial hair and sharper lines, ensuring they remain untouched and crisp.
Q4: My image looks dull after frequency separation. What went wrong?
If your image appears dull or desaturated after setting up frequency separation (especially after applying the Linear Light blending mode to the High Frequency layer), it usually indicates an error in the “Apply Image” settings in Step 4. Double-check that:
- Layer was set to “Low Frequency (Color/Tone).”
- Blending was “Subtract.”
- Scale was “2.”
- Offset was “128.”
- Invert was unchecked.
If these settings are incorrect, the layers won’t perfectly recreate the original image, leading to dullness.
Q5: Should I do skin retouching before or after global color grading?
Generally, it’s best to perform skin retouching before global color grading or creative effects. This allows you to perfect the skin tones and texture on a neutral canvas. Once the skin is looking good, you can then apply your overall color grades, contrast adjustments, and other creative enhancements to the entire image, ensuring the skin reacts consistently with the rest of the photograph’s aesthetic.
See more: How to Retouch and Smooth Skin Professionally in Photoshop.
Discover: AskByteWise.